3-D Printed Case for the AVNA1 Audio Vector Network Analyzer
This really good looking case for the AVNA can be made by 3-D printing.
Mike Runyan has designed an enclosure for the AVNA1. Thanks, Mike for
figuring this all out and making the details available. The pictures and text below
are from Mike and tell the story. The STL files to drive the 3-D printer
are just below. The first four files make the standard case. This includes openings
in the base for the two
micro-SD Cards, that may be useful in the future, but are not used in the current design.
An alternate base, without openings, is the fifth file down. Pick the base you desire.
avna1baseSDcuts.stl (1.8 MB) for the base half, including openings for the SD cards.
avna1frontpanel.stl (5.4 MB) for the main front panel half, with cutouts for the display and connectors.
avna1base.stl (1.3 MB) for the
alternate base half, without micro SD Card cutouts.
Mike printed all parts with PRUSA MK3, SLic3r, standard '0.2mm FAST MK3'
setting except vertical shell perimeter minimum 2, no support, the rest standard
settings. The STLs need to be enlarged 2540X.
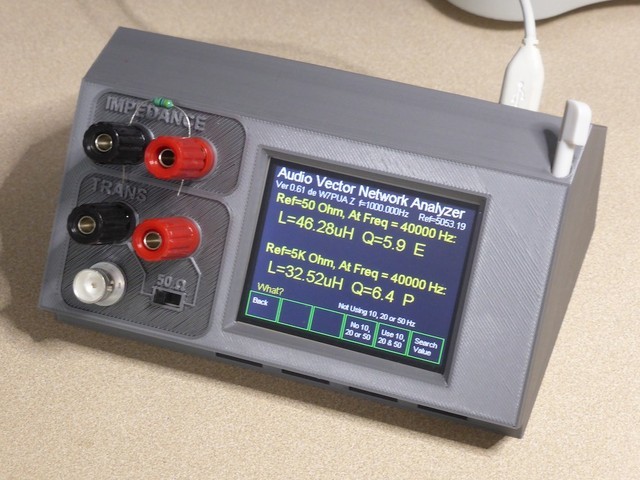
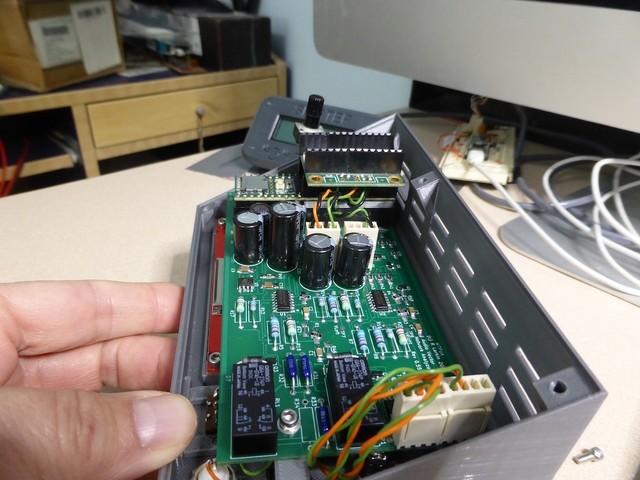
This shows the AVNA running in the printed case.
Alibre Cad was used to make the files.
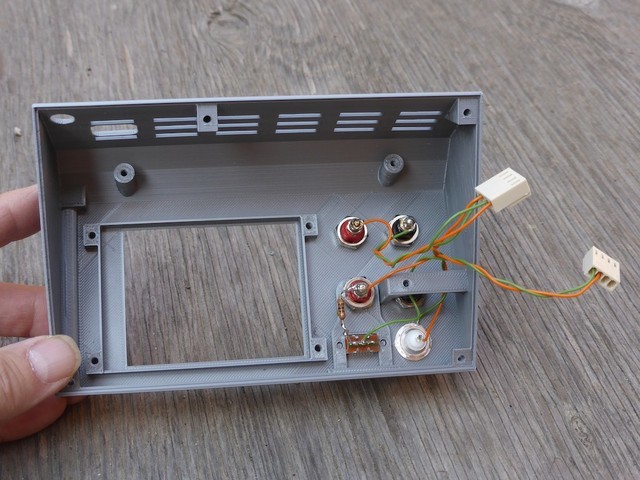
This shows how the clip holds the switch in using the terminal
screws. The switch is E-Switch #EG1201A, Digi-key EG1902-ND. All the
screws are #4-40 X .25inch long cap screws. These will self tap into
the plastic but a regular tap will make it easier.
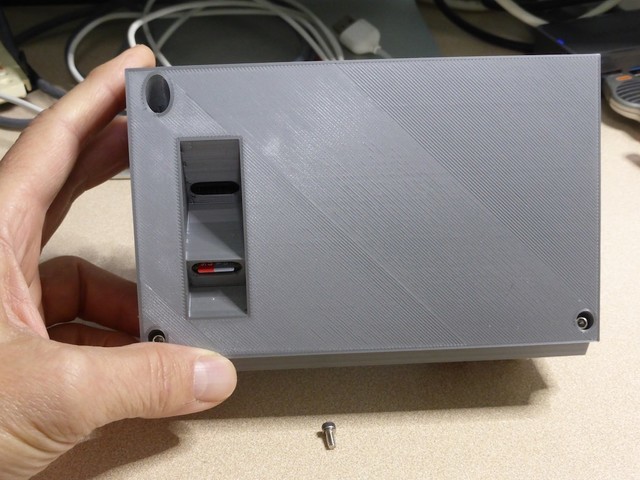
This is the base with cutouts to access the SDcards. You
don't need the SDcards for the AVNA. Note that with the regular back
you can not have an SDcard in the Teensy slot, it will hit the bottom.
Also shown is a 4-40 screw. This is the size I use for all my 3D
printed stuff. Metric sizes are to fine threaded and strip in the plastic.
The volume control on the audio board is not needed for the AVNA.
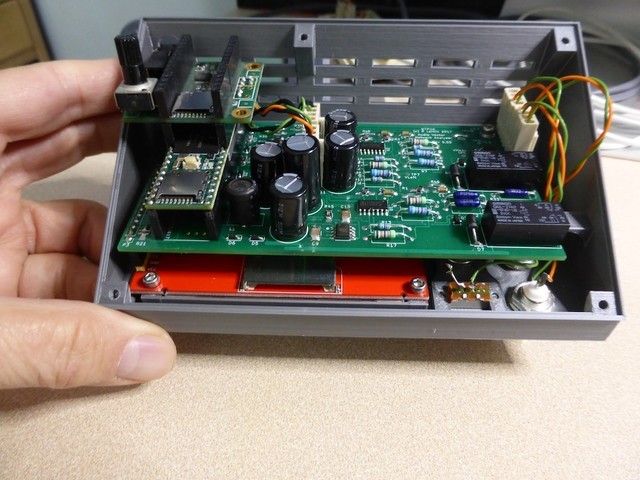
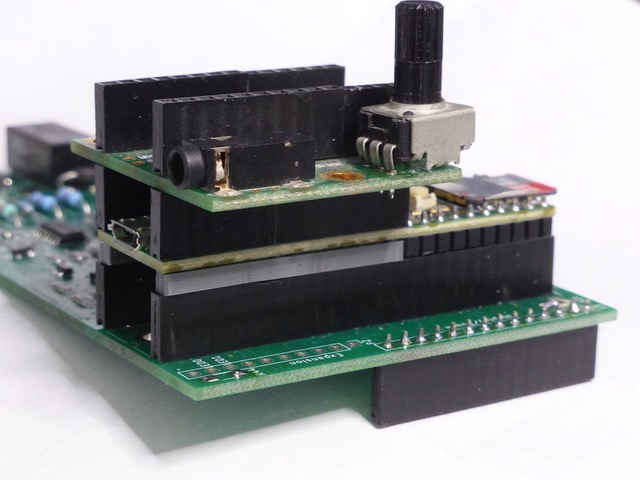
The stackup of the boards is shown with the 3D printed spacer
between the rear of the main board headers and the Teensy (looks white).
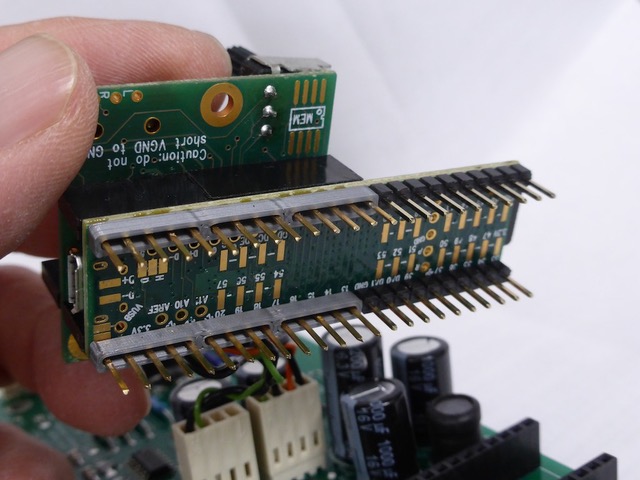
This is different from the stack-up I showed in the other thread. I
clipped the leads on both the audio board and Teensy headers so the pwbs
would sit flush on the header below so the slots for the SDcards would end
up in a consistent place. Again, if using the regular back without the
SDcards the stack-up doesn't matter. Also note that I messed with the pwb
to get the wiring to look like it does so don't blindly copy it.
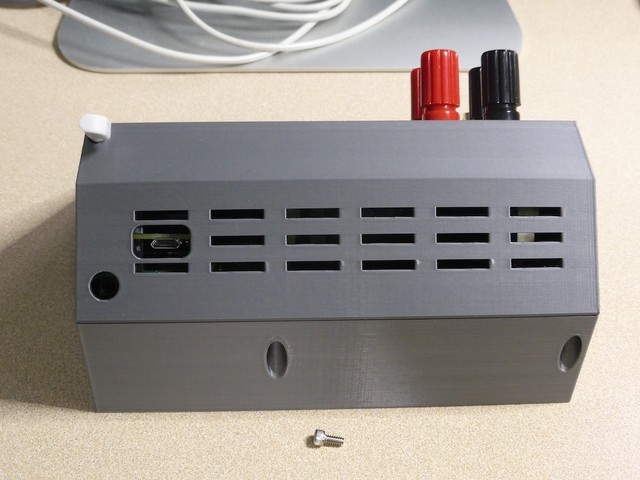
This shows the USB port, earphone jack and touch screen pen.
This is how I oriented each for printing. I would suggest printing one at a time.
The spacers loosely fill the gap between the boards allowing you to press the assembly
together without worrying about bending the board. The headers are typical .350 high
with the AVNA mounted headers having ~.130 inch tails and the others longer tails
trimmed to ~.230 inch to fit flush in the next header.
The stack-up looks like this. Again note that the gain control
seen on the Audio Adaptor board is not used in the AVNA, but neither
is the pin it controls.