Birdwatcher-2 Building the Hull
Birdwatcher-2 Sailboat, designed by Phil Bolger
The hull of the Birdwatcher-2 (BW-2) is a Sharpie (dory) shape, and assembles simply by bending full length plywood sides around four frames, along with attachment at the stem and stern. This page shows that and the attachment of the bottom. As of 9 July 2005, this phase is approaching completion, as shown below. Pictures of the frame construction are on a separate frames page.
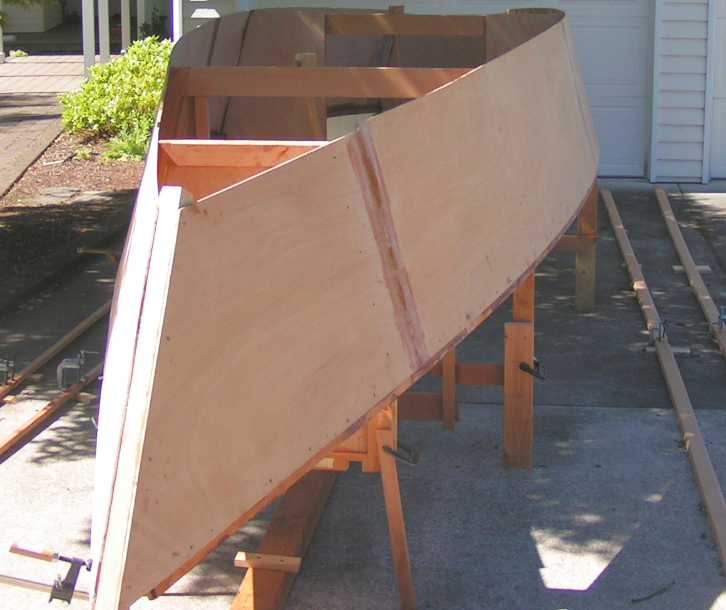
The side panels have been epoxied to the frames and to the coaming. Lots of dry-wall screws were used in addition to clamps to hold the assembly together while the epoxy set up. I used slow MAS epoxy and the weather was cool, so this required several days. In addition, the rain started after attaching the starboard panel, and I had to let the boat sit in an unsymmetrical condition. I added braces and measured the positions of the frames to try to not have unfair sides after the epoxy set. After attaching the port panel, there was much relief to find the boat measurered out to be symmetrical without "pushing" the shape.
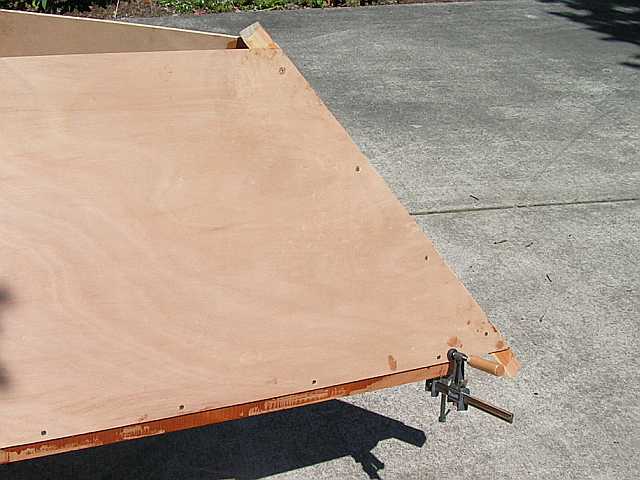
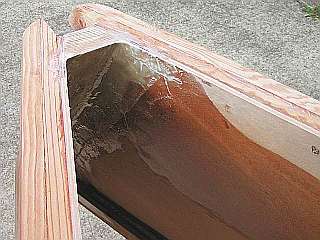
This is the bow with the panels attached to the inner stem. The screws here are bronze and will be left in place.
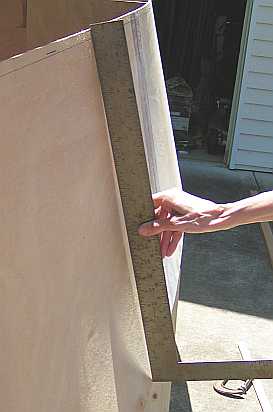
Some of the interesting elements of boatbuilding are surprise curves. In this case, it was found that between frames B and C the side panels were bowed inward. Janet is holding a straight edge along the side and a gap of almost 1/2 half inches exists. The natural conical bend of the panel is at right angles to that shown here, and therefore this bend is "impossible!" At first the changing humidity was suspected for causing this. Further measurements showed a simpler explanation, shown in the sketch below.
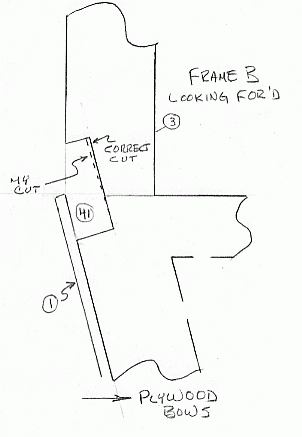
I had not been careful enough in cutting the notch for the coaming (item 41) in frame B. The bottom was correctly cut, but the sloped right edge was not quite parallel with the plywood mounting surface. It misses by about 1/16 inch on one side of the boat and 3/32 inch on the other. This is not much error, but when the coaming is clamped to that surface, it also is at the wrong angle. The 1-inch thick coaming wins the battle with the 6 mm plywood and a bow results. Further experimentation showed that a few vertical members added inside the wall, on both sides of frame B, removes most of the bowing without adding "wrinkles" to the sides.
We are now looking at the stem, before the bottom is attached. The inside has been wrapped with 2-layers of fiberglass and fillets formed where the stem joins with the sides. An outer-stem post will be added after the bottom is attached. The double outside-chine logs can be seen fastened to the side panels, awaiting the bottom attachment.
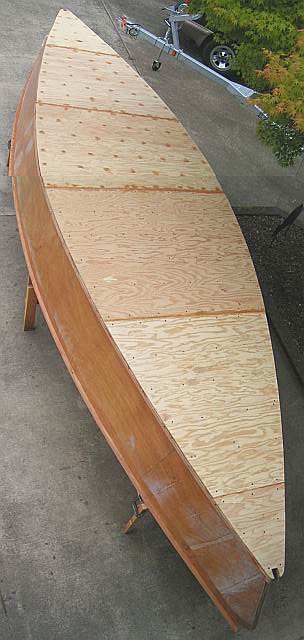
The bottom consists of two layers of 1/2-inch plywood. Here is the second layer with the forward half (to the top) complete and the aft half awaiting the epoxy set-up. Dry wall screws attach the two layers together until the epoxy is hard, and then the screw holes are filled, as can be seen in the forward half. I was going to use a patchwork of plywood pieces, but at the suggestion of Jack Wyman, I made all panels of the bottom go fully across. This worked out to be simpler, stronger and in the end, was quite efficient in using the plywood. Six panels are used for each layer. Of course, the jonts for the two layers are staggered in position. I think the strange "tippy illusion" of this picture somehow comes from standing on a ladder for the photos and then assembling the tall picture from two halves!
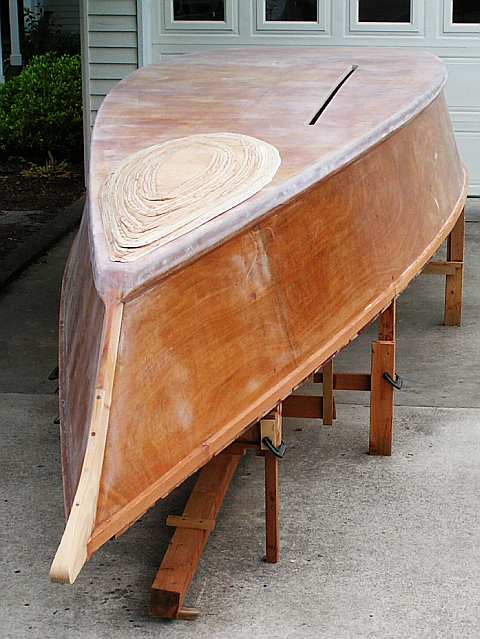
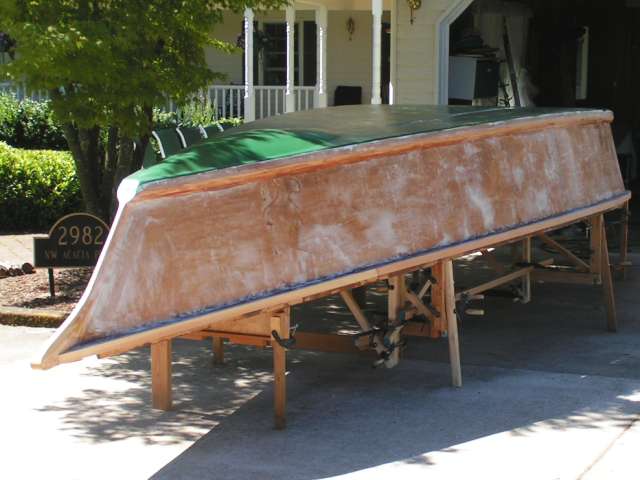
Here is the hull as of 9 July 2005. The bottom has been covered with 20 oz fiberglass sheathing, filled and faired with microballoon loaded eoxy. The heavy fiberglass was a bargain purchase and I was concerned about getting it to go around the edges. This proved to not be a problem, but the thick material did soak up a lot of epoxy and filler. The centerboard slot has been cut, but not yet finished out. The five-layer "anti-slap pad" is just sitting on the bottom. The 1/2-inch plywood has had the bevels rough cut with a band saw, but not yet made smooth. Except for the layer next to the bottom, this will be done with a belt sander after the pad is on the boat. The outer stem and stern posts are attached and the chine logs wrapped around them. The overall weight of the bottom is about 225 pounds plus 25 more for the pad.
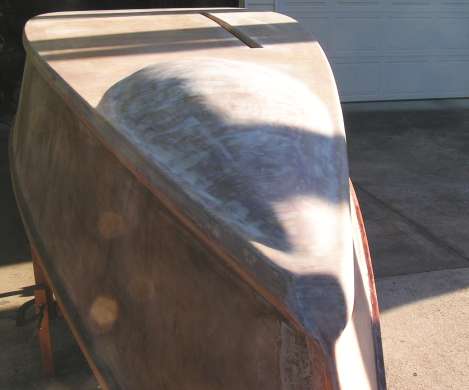
Now the anti-slap pad has been shaped, covered with 20 oz. fiberglass and faired, ready for painting.
The bottom was primed and then painted with four coats of Pittsburgh Paint Company 100% Acrylic Latex house paint. The "Hunter Green" will extend up to the top of the chine logs, probably. The "top sides" will be an off white of the same type as the bottom.
Back to Building Birdwatcher-2 main page
This was last revised 27 July 2005. Bob Larkin, Corvallis, Oregon